#Bootstrap 4 Tutorial
Explore tagged Tumblr posts
Visit Tumblr Blog
Explore Tumblr blogs with no restrictions, modern design and the best experience.
Last Seen Tumblr Blogs


Fun Fact
Tumblr was the first site to host the blog for President Barack Obama in 2011.
Text
Bootstrap 4 Tutorial for Beginners: Learn the Basics of Responsive Web Development

If you’re new to web design and development, Bootstrap 4 is the perfect tool to help you get started. It’s a free, open-source framework that makes creating responsive and visually appealing websites quick and easy. With Bootstrap 4, you don’t need advanced coding skills – the framework does the heavy lifting for you!
One of the standout features of Bootstrap 4 is its grid system, which allows you to create layouts that adapt beautifully to different screen sizes. Whether you’re building a website for desktops, tablets, or smartphones, Bootstrap ensures your content looks great everywhere.
Bootstrap 4 also includes a wide variety of components, such as navigation bars, buttons, modals, and forms. These pre-designed elements save you time and effort, allowing you to focus on customizing the look and feel of your website.
Another reason Bootstrap 4 is ideal for beginners is its built-in utilities, which make styling easier. With simple classes, you can adjust spacing, alignment, colors, and more without writing complex CSS.
Getting started with Bootstrap 4 is simple. All you need is basic HTML knowledge, and you’re ready to dive in. Many online tutorials and resources are available to guide you step by step.
If you’re ready to create stunning, responsive websites, explore more with the Bootstrap Tutorial for Beginners at Tutorial and Example. Happy learning!
0 notes
Text

Boost your web design skills with our Bootstrap 4 tutorial for beginners! Learn to create responsive, professional websites easily using Bootstrap's grid, components, and utilities. Perfect for aspiring developers and designers. Start your journey today!
0 notes
Text
Top 10 Front-End Frameworks and Libraries for 2024
As the web development landscape continues to evolve, staying updated with the latest front-end frameworks and libraries is crucial for any developer. Whether you're a seasoned pro or just starting out, knowing which tools to use can significantly impact your productivity and the quality of your projects. In this post, we’ll explore the top 10 front-end frameworks and libraries that are set to dominate in 2024.
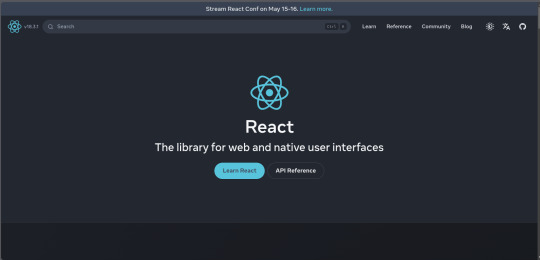
1. React
React remains one of the most popular front-end libraries, known for its simplicity and flexibility.
Key Features of React
Component-Based Architecture: Reusable components make development efficient and manageable.
Virtual DOM: Enhances performance by minimizing direct DOM manipulation.
Strong Community Support: A vast ecosystem of tools, libraries, and tutorials.
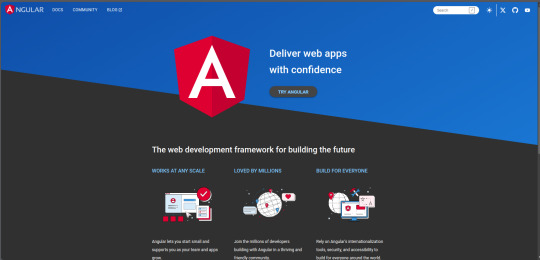
2. Angular
Angular, backed by Google, is a powerful framework for building dynamic single-page applications (SPAs).
Why Choose Angular?
Two-Way Data Binding: Synchronizes data between the model and the view.
Dependency Injection: Improves code maintainability and testability.
Comprehensive Documentation: Extensive resources for learning and troubleshooting.
3. Vue.js
Vue.js has gained popularity due to its gentle learning curve and versatility.
Advantages of Vue.js
Reactive Data Binding: Simplifies state management.
Single-File Components: Encapsulate HTML, CSS, and JavaScript in one file.
Flexibility: Can be used for both large-scale and small-scale applications.

4. Svelte
Svelte is a relatively new player that compiles components into highly efficient vanilla JavaScript at build time.
Svelte’s Standout Features
No Virtual DOM: Directly manipulates the DOM for better performance.
Less Boilerplate: Cleaner code with minimal overhead.
Ease of Use: Intuitive and straightforward syntax.

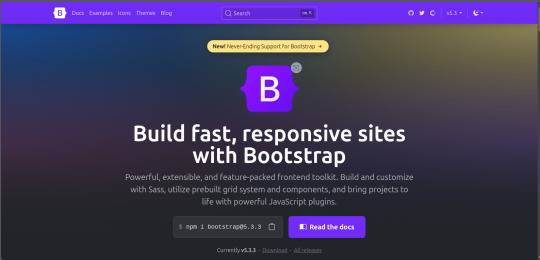
5. Bootstrap
Bootstrap is a front-end framework that provides pre-designed components and a responsive grid system.
Benefits of Using Bootstrap
Responsive Design: Ensures your site looks great on all devices.
Pre-Styled Components: Saves time with ready-to-use UI elements.
Customizable: Easily customize with Sass variables and Bootstrap’s extensive options.
6. Tailwind CSS
Tailwind CSS is a utility-first CSS framework that allows for rapid UI development.
Tailwind CSS Features
Utility-First Approach: Use utility classes directly in your HTML.
Customizable: Extensive configuration options to suit your project’s needs.
Consistency: Enforces a consistent design language across your project.

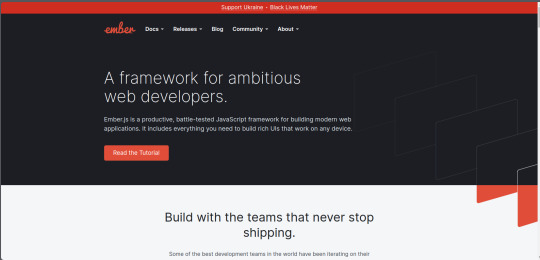
7. Ember.js
Ember.js is a robust framework for building ambitious web applications.
Why Ember.js Stands Out
Convention over Configuration: Reduces the amount of decision-making and boilerplate code.
Strong Routing: Powerful routing capabilities for managing application state.
Productivity: Focuses on developer productivity with built-in best practices.
8. Alpine.js
Alpine.js offers a minimal and lightweight way to add interactivity to your websites.
Key Features of Alpine.js
Lightweight: Small footprint with only a few kilobytes.
Declarative Syntax: Similar to Vue.js, making it easy to understand and implement.
Ease of Integration: Can be easily integrated into existing projects.

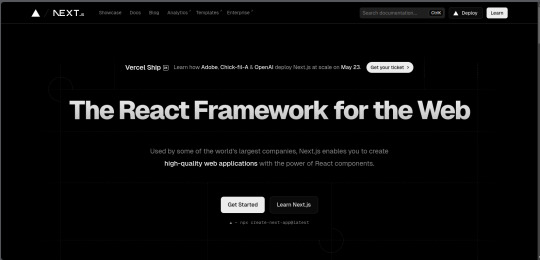
9. Next.js
Next.js is a popular React framework that enables server-side rendering and static site generation.
Benefits of Using Next.js
Server-Side Rendering (SSR): Improves performance and SEO by rendering pages on the server.
Static Site Generation (SSG): Pre-renders pages at build time for fast load times.
API Routes: Allows you to create API endpoints within your application.
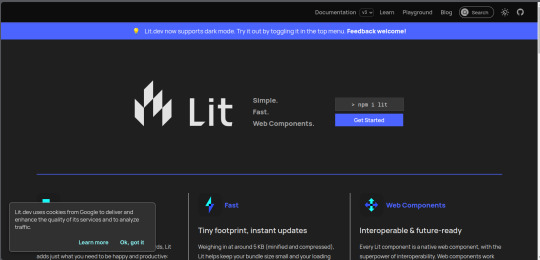
10. Lit
Lit is a simple library for building fast, lightweight web components.
Advantages of Lit
Web Components: Embraces the web components standard for reusable, encapsulated HTML elements.
Performance: Lightweight and highly performant.
Simple API: Easy to learn and use with a minimal API surface.
Conclusion
Choosing the right front-end framework or library can significantly impact your workflow and the quality of your projects. Whether you prefer the flexibility of React, the structure of Angular, or the simplicity of Svelte, there's a tool out there to suit your needs.
Final Tips for Selecting a Framework or Library
Project Requirements: Consider the specific needs of your project.
Community and Support: Look for frameworks with strong community support and documentation.
Learning Curve: Choose a tool that matches your current skill level and the time you have available to learn.
By staying informed about the latest tools and trends, you can ensure that your skills remain relevant and that you can deliver the best possible results in your projects. Happy coding!
Remember, the best tool is the one that helps you get the job done efficiently and effectively. So, dive into these frameworks and libraries, and take your front-end development skills to the next level!
Share Your Thoughts
I'm curious to know your thoughts on these front-end frameworks and libraries. Have you used any of them in your projects? Which one is your favorite, and why? Share your experiences and insights in the comments below.👇
2 notes
·
View notes
Text
Mastering Web Development: A Comprehensive Guide for Beginners
In the vast landscape of technology, web development stands as a crucial cornerstone. It encompasses the art and science of building websites, ranging from simple static pages to complex web applications. Whether you're aiming to pursue a career in software development or seeking to enhance your digital presence, understanding web development is essential.
In this comprehensive guide, we'll take you through the fundamental concepts and practical skills needed to master web development from scratch. Let's dive in!
1. Understanding HTML (Hypertext Markup Language)
HTML serves as the backbone of every web page, providing the structure and content. It uses tags to define different elements such as headings, paragraphs, images, and links. By mastering HTML, you'll be able to create well-structured and semantically meaningful web documents.
2. Exploring CSS (Cascading Style Sheets)
CSS is the language used to style HTML elements, enhancing their appearance and layout. With CSS, you can customize colors, fonts, spacing, and more, giving your website a polished and professional look. Understanding CSS selectors and properties is essential for effective styling.
3. Introduction to JavaScript
JavaScript is a versatile programming language that adds interactivity and dynamic behavior to web pages. From simple animations to complex web applications, JavaScript powers a wide range of functionalities. Learning JavaScript fundamentals such as variables, functions, and events is crucial for web development.
4. Building Responsive Websites
In today's mobile-centric world, it's essential to create websites that adapt seamlessly to various screen sizes and devices. Responsive web design achieves this by using fluid grids, flexible images, and media queries. Mastering responsive design principles ensures that your websites look great on desktops, tablets, and smartphones.
5. Introduction to Version Control with Git
Git is a powerful tool for tracking changes in your codebase and collaborating with other developers. By learning Git basics such as branching, merging, and committing, you can streamline your development workflow and effectively manage project versions.
6. Introduction to Front-End Frameworks
Front-end frameworks like Bootstrap, Foundation, and Materialise provide pre-designed components and stylesheets to expedite web development. By leveraging these frameworks, you can create responsive and visually appealing websites with less effort and code.
7. Introduction to Back-End Development
While front-end development focuses on the user interface, back-end development deals with server-side logic and database management. Learning back-end languages such as Node.js, Python, or PHP enables you to build dynamic web applications and handle user interactions efficiently.
8. Deploying Your Website
Once you've developed your website, it's time to make it accessible to the world. Deploying a website involves selecting a web hosting provider, uploading your files, and configuring domain settings. Understanding the deployment process ensures that your website goes live smoothly.
9. Conclusion and Next Steps
Congratulations on completing this comprehensive guide to mastering web development! By now, you've gained a solid understanding of HTML, CSS, JavaScript, version control, frameworks, and deployment. As you continue your journey in web development, remember to stay curious, practice regularly, and explore advanced topics to further refine your skills.
Resources for Further Learning:
Online tutorials and documentation
Interactive coding platforms
Community forums and discussion groups
Next Steps:
Explore advanced topics such as web performance optimization, server-side rendering, and progressive web apps.
Build real-world projects to apply your skills and showcase your portfolio.
Stay updated with the latest trends and technologies in web development through blogs, podcasts, and conferences.
With dedication and perseverance, you'll continue to evolve as a proficient web developer, creating innovative solutions and contributing to the ever-changing digital landscape . Happy coding!
4 notes
·
View notes
Text
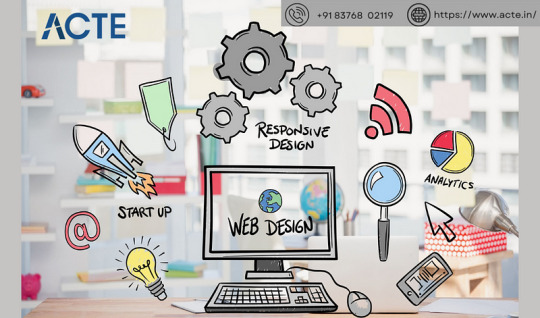
How to Begin Your Web Design Journey: A Step-by-Step Guide in Simple Terms
Understanding the Basics:
Learn about HTML, which is like a web page’s skeleton.
Understand CSS, which is like makeup for web pages.
Know how to make websites look good on different screens.
2. Choose your tools:
Start with simple text editors like Notepad (for Windows) or TextEdit (for Mac).
Later, try fancier editors like Visual Studio Code.
For making pictures, try Adobe Photoshop or Illustrator.
3. Learn HTML and CSS:
Use websites like W3Schools or Codecademy.
If you want to learn more about web design with certification and placement, ACTE Institute offers comprehensive machine learning training courses that can give you the knowledge and skills necessary to excel in this field. Consider the infinite possibilities for data analysis, automation, and decision-making that machine learning may create.
YouTube: There are many video tutorials covering HTML and CSS for beginners.
They teach you how to make web pages and make them look nice.
You can also learn from courses on Coursera or edX.
4. Practice your skills.
Besides learning, make simple web pages to get better.
Try harder projects as you get more confident.
Make your own website to practice lots.
5. Responsive Web Design:
Make sure your websites work well on phones and computers.
Learn about media queries (they help your design fit different screens).
6. Master CSS Layouts:
Get really good at arranging web stuff using CSS (like making boxes and arranging them nicely).
7. Web Design Frameworks:
Think about using ready-made kits like Bootstrap.
They have pre-made pieces to help you design faster.
8. UI/UX Design:
Learn to make websites easy to use and nice to look at.
Think about how people will use your site.
9. Web Hosting and Domain:
To show your website to people, you need a place to put it (hosting) and a name for it (domain).
Lots of companies can help with this, like Bluehost or HostGator.
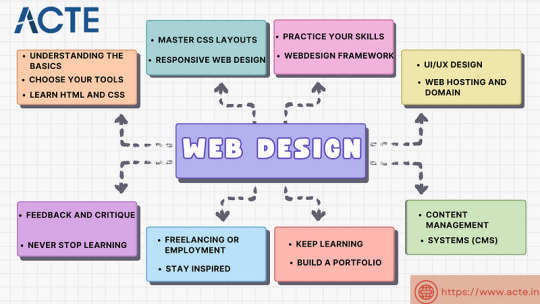
10. Content Management Systems (CMS):
Consider using tools like WordPress to manage your website easily.
11. Keep Learning:
Web design keeps changing, so keep learning new stuff.
Read blogs, watch webinars, and take more advanced classes.
12. Build a portfolio.
Make a collection of your best work to show others.
People who might hire you want to see what you can do.
13. Freelancing or employment:
Decide if you want to work alone or with a company.
Both ways have good things and not-so-good things, so pick what you like.
14. Networking:
Join groups of web designers to meet others like you.
Learning from others can help you become better.
15. Feedback and criticism:
Don’t be shy to ask for advice on your work.
When people give you tips, it helps you improve.
16. Launch your projects:
When you’re good enough, work on real websites.
Offer to make websites for friends or local businesses.
17. Stay Inspired:
Be creative and get ideas from different places.
Nature, art, and other designers can help you think of cool stuff.
18. Never Stop Learning:
Web design always changes, so keep learning new things.
Stay curious and open to learning more tricks and tools.
The secret to success in web design is to start with the fundamentals and gradually advance your abilities. Keep in mind that on this trip, patience and practice are the keys to success. As your skills advance, you’ll have the imagination needed to realise your ideas for websites. So put your hands in your pockets, launch your preferred coding editor, and start your web design experience!
4 notes
·
View notes
Text
ASP.NET Core eShop Tutorial Part 4: Razor Views, ViewModels, Partial Views & Bootstrap Integration
In this tutorial, I walk you through how to implement views with semantic tags, creating partial views, and adding additional actions to render image files—key skills for building a modern, maintainable UI. 🔍 What You’ll Learn in This Tutorial Implementing View with Sementic tags knowledge Creating Partial Views Adding additional actions to render Image Files 📦 Resources & Code My GitHub…

View On WordPress
0 notes
Text
ERPGo SaaS Nulled Script 6.8

Unlock Premium Business Management with ERPGo SaaS Nulled Script In today’s fast-paced business landscape, having a robust and comprehensive enterprise management system is no longer a luxury—it’s a necessity. That’s where the ERPGo SaaS Nulled Script comes in. Designed for modern businesses, this all-in-one solution empowers startups, SMEs, and enterprises to streamline their operations without breaking the bank. What is ERPGo SaaS Nulled Script? The ERPGo SaaS Nulled Script is a complete business management platform that integrates essential modules such as Accounting, CRM, HRM, Project Management, POS, and more into one powerful solution. As a SaaS-based script, it enables you to launch your own cloud-based ERP service, offering advanced tools to your clients while maintaining full control over the backend. Whether you're managing clients, tracking inventory, or analyzing financial data, ERPGo makes it seamless and intuitive. This nulled version provides all premium functionalities completely free, opening the door for entrepreneurs and developers to access top-tier software without the usual costs. Technical Specifications Language: PHP (Laravel Framework) Database: MySQL Front-End: Bootstrap 4 Fully Responsive: Mobile and desktop ready Multi-Tenant Ready: Ideal for SaaS model deployment Modular Architecture: Easily customizable and scalable Top Features and Benefits of ERPGo SaaS Nulled Script Multi-Company Support: Manage multiple businesses under one platform effortlessly. HRM System: Automate employee management, payroll, attendance, and leave tracking. Project Management: Keep your teams on track with task allocation, deadlines, and collaboration tools. CRM Tools: Strengthen customer relationships with powerful contact and sales pipelines. Accounting Module: Generate invoices, manage expenses, track income, and handle taxes with ease. POS Integration: Real-time point-of-sale system for retail and online stores. Real-World Use Cases The ERPGo SaaS Nulled Script is highly versatile, making it suitable for: Startups: Launch your own ERP SaaS product and offer subscription-based services. Agencies: Help your clients manage their businesses with a branded ERP solution. Retail Stores: Use the integrated POS system to handle sales and inventory efficiently. Freelancers: Manage your personal projects, invoices, and client database under one dashboard. Simple Installation and Easy Setup Getting started with the ERPGo SaaS is straightforward. Once you download the package, follow the included installation guide to deploy it on your server. With a user-friendly setup wizard and detailed documentation, even users with minimal technical knowledge can have it running in no time. Frequently Asked Questions (FAQs) Is ERPGo SaaS Nulled Script safe to use? Yes, when downloaded from trusted sources like ours, the script is secure and virus-free. We ensure all files are clean and ready to use. Can I use ERPGo for multiple businesses? Absolutely. The script supports a multi-company setup, letting you manage several entities with complete separation and control. What makes this script different from others? ERPGo stands out due to its clean UI, powerful features, and SaaS-readiness. The nulled version includes all premium modules at no cost. Is technical support available? While official support isn’t provided with the nulled version, our community forums and tutorials offer plenty of help to get you started. Download ERPGo SaaS Nulled Script Now Don’t miss the opportunity to power your business with the most dynamic ERP tool available. Download the ERPGo SaaS today and explore all its capabilities for free. And if you're exploring other premium tools, check out our curated collection of nulled plugins to further enhance your website functionality. Looking for a top-tier WordPress theme as well? We recommend the versatile Impreza NULLED theme, a perfect complement to any web project. Take full control
of your business systems with ERPGo—download, install, and start managing smarter, not harder.
0 notes
Text
Full Stack in Action: Real Projects That Make You Job-Ready
When learning full stack web development, tutorials and theoretical knowledge only get you so far. The real transformation happens when you apply that knowledge to build actual, functioning projects — the kind that mimic real-world scenarios, solve real problems, and impress hiring managers.
That’s what Full Stack in Action: Real Projects That Make You Job-Ready is all about. It’s not just about writing code — it’s about crafting solutions from front end to back end, and gaining confidence as a future-ready developer.
Why Real Projects Matter in Full Stack Learning
Let’s be honest — coding exercises are great for understanding syntax, but they don’t prepare you for building and deploying scalable applications. Real projects test your ability to:
Collaborate on multiple layers of development
Make design decisions that balance user experience and performance
Work with databases, APIs, version control, and cloud hosting
Handle bugs, test features, and make improvements
Think like a product developer, not just a coder
By working on real-world applications, learners of full stack web development can experience what it’s like to build something end-to-end — from designing responsive front-end interfaces to integrating robust back-end systems.
What Does “Full Stack” Really Involve?
A full stack web development professional is someone who understands both client-side and server-side technologies. That includes:
Front-End (Client Side): HTML, CSS, JavaScript, React, Angular, or Vue.js — everything users interact with.
Back-End (Server Side): Node.js, Express.js, Django, Ruby on Rails, or PHP — logic, data handling, and server functions.
Databases: MySQL, MongoDB, PostgreSQL, Firebase, etc.
Version Control: Git and GitHub for collaboration.
Deployment: AWS, Heroku, Netlify, or Vercel for going live.
Real Projects That Boost Your Portfolio
Here are some practical, engaging project ideas that can elevate your resume and make you stand out during interviews:
1. E-Commerce Website (Amazon Clone)
Front-end: Product listing, cart, search, filtering
Back-end: Inventory management, payment integration, user accounts
Skills: React, Node.js, MongoDB, Stripe API
2. Job Portal
Features: Job listing, company dashboard, resume uploads
Focus: Authentication, dynamic content, admin interface
Tech stack: Angular, Express.js, MongoDB, REST APIs
3. Blog Platform with CMS
Users can write, edit, delete posts; comments and likes
Admin panel with roles and permissions
Stack: Django, PostgreSQL, Bootstrap
4. Real-Time Chat Application
Features: Live messaging, rooms, media sharing
Use: Socket.io, WebSocket, Firebase
Front-end: React with Redux
5. Online Learning Management System (LMS)
Modules: Course enrollment, quiz system, certificates
Back-end logic: Role-based access, scoring, session tracking
Stack: MERN (MongoDB, Express.js, React, Node.js)
6. Portfolio Website with Blog Integration
Personal project showcasing your skills and experience
Includes projects, blog, contact form, testimonials
Deployed on: Netlify or GitHub Pages
How Real Projects Make You Job-Ready
Employers today are not just hiring coders — they want developers who can think critically, adapt quickly, and build scalable applications. Real-world projects offer:
Proof of Work: Showcases your skills beyond certificates
Problem Solving Experience: Bugs, deployment errors, and design challenges help you grow
Project Ownership: Build something you can confidently talk about during interviews
Adaptability: Exposure to a range of tools and technologies
Soft Skills You Build Along the Way
Working on full stack web development projects also enhances several key soft skills:
Time management and meeting deadlines
Communication and documentation
Collaboration via Git and project management tools
Presentation skills when demonstrating projects to peers or recruiters
Ready to Get Started?
Whether you're self-taught, bootcamp-trained, or currently pursuing a computer science degree, adding real-world applications to your portfolio is the smartest way to prepare for a developer role. Don’t wait for the “perfect time” — start simple, iterate, and keep building.
Final Thoughts
Full Stack in Action: Real Projects That Make You Job-Ready isn’t just a catchy phrase — it’s a mindset. It’s about learning by doing and embracing the messy, exciting, and rewarding journey of creating something functional and meaningful.
So take that leap. Pick a project, define your stack, and start building. Because the best way to learn full stack web development — and to get hired — is to show what you can build, not just what you know.
0 notes
Text
Mastering full stack development course
Are you ready to launch your career in web development? The demand for skilled developers is at an all-time high as businesses increasingly rely on web-based solutions. In order to succeed in this ever-changing field, a Full-Stack Developer Course with Placement can equip you with the necessary skills and career opportunities. From mastering key technologies to securing job placements, this expert guide will walk you through everything you need to know about becoming a full-stack developer. You'll have a clear plan for getting started in full-stack development by the end of this tutorial.
Step 1: Recognize the Functions of a Full-Stack Developer:
A full-stack developer is responsible for designing, developing, and maintaining applications on both the client and server sides. This requires collaborating with Technologies for the front end (such as user interface design and interaction) Back-end development (administration of databases and logic on the server) Data storage and retrieval databases Deployment & DevOps (hosting and scaling applications)
You can manage entire web projects as a professional when you master full-stack development.
Step 2: Master the Essential Technologies:
A structured full-stack development course will cover a broad range of tools and technologies.
What you need to know is as follows:
1. Front-End Development:
HTML, CSS, and JavaScript are the building blocks of interactive web design. Frameworks and Libraries: For creating cutting-edge applications, learn React.js and Angular.js. Responsive Web Design—Ensure your applications work on all devices using Bootstrap and CSS Flexbox/Grid.
2. Final Development Express:
JS and Node.js make server-side applications that are quick and scalable. Programming Languages— Become proficient in Java, Python, or PHP (depending on your preferred stack).
Learn how to build and manage RESTful APIs to connect front-end and back-end systems in API Development.
3. Management of databases
Ø SQL databases: MySQL and PostgreSQL are
Ø NoSQL Databases: Firebase, MongoDB
Ø Database Optimization and Design: Learn how to structure and optimize databases for efficiency
4. Implementation and DevOps
Version Control: Git and GitHub can be used to manage changes to code and work with teams.
Hosting and Cloud Services: Discover AWS, Docker, and CI/CD pipelines for a streamlined deployment.
Server Management: Configure and manage servers effectively to keep applications running smoothly.
Step 3: Get Real-World Experience:
The most important factor in mastering full-stack development is practical experience. Here’s how you can gain real-world experience:
Build Projects: Work on personal or freelance projects to apply your skills.
Contribute to open source: Join GitHub projects to collaborate with other developers.
Work on Internships: Apply for internships or apprenticeships to gain industry exposure.
Step 4: Leverage Placement Assistance to Secure a Job
The placement assistance provided by leading institutions is one of the greatest advantages of enrolling in a Full-Stack Developer Course. Here’s how you can maximize these services:
Resume Building Workshops: Craft a strong resume that highlights your skills and projects.
Mock Interviews & Career Guidance: Get expert feedback to improve your interview performance.
Opportunities for Networking: To broaden your professional network, go to tech meetups, alumni meetups, and industry events.
Support for Job Placement: To assist students in securing full-time employment, numerous training establishments have partnerships with leading tech companies.
Who Should Take This Course?
A Full-Stack Developer Course is ideal for:
Students & Fresh Graduates: Start your journey in the IT industry.
Working Professionals: Transition into web development from another field.
Entrepreneurs and freelancers: Create your own applications without employing a team
Career changers: Follow a planned learning path into the tech industry.
Why Choose a Full-Stack Developer Course?
There are numerous advantages to taking a Full-Stack Development Course, including
Affordable Training Programs: Quality education without the high costs of traditional degrees.
Growing IT Job Market: A rising demand for skilled developers.
Industry-Aligned Curriculum: Stay updated with the latest trends in web development.
Supportive Learning Environment: A large group of tech aficionados and instructors.
Final Thoughts:
Take Your Career to the Next Level Becoming a full-stack developer is one of the best careers moves in today’s tech-driven world. You can build high-quality applications, get high-paying jobs, and grow your career exponentially with the right training and hands-on experience.
“Get started today on your journey to becoming an expert full-stack developer!”
#fullstackdevelopercourseincoimbatorewithplacement#bestfullstackdevelopercourseincoimbatore#fullstackdevelopmenttrainingincoimbatore#javafullstackdevelopercourseincoimbatore#pythonfullstackdevelopercourseincoimbatore#fullstackwebdevelopmentcoursedetails#webdevelopmentcoursecoimbatore#advancedwebdevelopmenttrainingcoimbatore#learnfullstackwebdevelopmentintamil
0 notes
Text
Mastering Web Design with Bootstrap 4 Tutorial: A Comprehensive Guide
Are you looking to take your web design skills to the next level? Look no further than the Bootstrap 4 Tutorial. In this comprehensive guide, we will delve into the world of Bootstrap 4, the renowned front-end framework. Whether you're a beginner or an experienced developer, this tutorial will equip you with the knowledge and techniques to create visually stunning and responsive websites. Let's dive in!
Bootstrap 4 Tutorial is a treasure trove of information for web designers and developers. It covers everything from the basics to advanced topics, providing a step-by-step approach to mastering Bootstrap 4. With its responsive grid system, pre-built components, and extensive customization options, Bootstrap 4 empowers you to craft visually appealing websites with ease.
The tutorial begins with an overview of the framework, explaining its key features and advantages. It then progresses into the practical aspects, guiding you through the process of setting up Bootstrap 4 in your project. From there, you'll learn how to harness the power of the responsive grid system to create flexible and adaptive layouts.
One of the highlights of Bootstrap 4 is its extensive collection of CSS components, such as navigation bars, buttons, forms, and cards. The tutorial provides detailed explanations and examples of how to utilize these components effectively. Additionally, you'll explore the JavaScript plugins offered by Bootstrap 4, enabling you to enhance the functionality and interactivity of your websites.
In conclusion, the Bootstrap 4 Tutorial is a comprehensive resource that empowers web designers and developers to create visually stunning and responsive websites. With its intuitive approach and extensive coverage of Bootstrap 4's features, this tutorial is a valuable asset for anyone looking to enhance their web design skills. Don't miss out on the opportunity to master Bootstrap 4 and elevate your web development projects to new heights.
To access the Bootstrap 4 Tutorial and embark on your web design journey, visit Tutorial and Example
0 notes
Text
Welcome to the "Bootstrap Tutorial" on TutorialAndExample.com. Whether you're a beginner or an experienced web developer, this comprehensive guide will walk you through the ins and outs of Bootstrap. Learn how to leverage its powerful features and create stunning, responsive websites that captivate your audience.
0 notes
Text
Which project answers the set brief best and why?
Body and Experience Because I created a scent installation for this project, I think scent is indeed a great experience. The audience can deepen their memory through it
Which was the most successful project Technically - might be quality of making, drawing, images, animation, etc. +why?
sequences and time Learned about skeletal animation in this project. And I think the results are quite smooth and the scenes are rich
Which was the most successful project Theoretically - the ideas communicated through the work, +why?
body and experience I think the bootstrapping process makes perfect sense. The viewer observes the device, opens it, writes down a wish while remembering the smell and thinking of the happy memory one day
What was the most useful piece of research + why?
Identity and place Through my research it became clear to me that Elephant and Castle had a surprisingly high number of mobile phone thefts! In particular, four mobile phones were lost on my way to school every day.
Apart from finished work best image you made as an experiment + why you think this?
visual authorship and space I think I might be good at painting soft purple-pink flowers. Viewers say it has a slippery feel to the leaves.
What was the best idea you didn't take forward or realise + why not?
I had wanted to make gas collection bottles and collect various scents for project 4, but considered that too many scents would be exhausting for the viewer and that such bottles are not cheap + need to be assembled & created by myself
What was the best conversation you had about work in this unit + why?
Regarding Kew Gardens, many of us have been there and I learnt that the greenhouses don't open in the autumn and that there are different plants open to visit in different seasons.
Which was the best tutorial you had in this unit and why?
It should be the October one, the story of the pumpkin and the girl is very intriguing and the invitations are fun
0 notes
Text
Build Portfolio Website in Laravel 11: Your Comprehensive Guide
Building a portfolio website is an essential step for showcasing your skills, projects, and achievements in today's competitive world. Laravel 11, the latest version of the robust PHP framework, offers unparalleled tools and features to create a stunning and functional portfolio website. In this guide, we’ll walk you through the process of building a portfolio website in Laravel 11, ensuring you have a step-by-step roadmap to success.
Why Choose Laravel 11 for Your Portfolio Website?
1. Modern Features
Laravel 11 introduces enhanced routing, improved performance, and advanced tooling that make it the go-to choice for web development.
2. Scalability
Whether you're a freelancer or a business owner, Laravel 11's scalability ensures your website can grow as your portfolio expands.
3. Security
With built-in authentication and security features, Laravel 11 protects your data and provides peace of mind.
4. Community Support
Laravel’s vast community ensures you’ll find solutions to problems, tutorials, and plugins to enhance your website.
Key Features of a Portfolio Website
To build a portfolio website in Laravel 11, ensure it includes:
Homepage: A welcoming introduction.
About Section: Your background and expertise.
Projects: A gallery showcasing your work.
Contact Form: Easy communication.
Blog Section: Share insights and updates.
Responsive Design: Optimized for all devices.
Getting Started with Laravel 11
Step 1: Install Laravel 11
Start by setting up Laravel 11 on your local environment.
composer create-project --prefer-dist laravel/laravel portfolio-website
Step 2: Configure Your Environment
Update your .env file to set up the database and other environment variables.
DB_CONNECTION=mysql
DB_HOST=127.0.0.1
DB_PORT=3306
DB_DATABASE=portfolio
DB_USERNAME=root
DB_PASSWORD=yourpassword
Step 3: Set Up Authentication
Laravel 11 offers seamless authentication features.
php artisan make:auth
This command generates routes, controllers, and views for user authentication.
Step 4: Design Your Database
Create tables for your portfolio items, such as projects, blogs, and user profiles. Use migrations to structure your database.
php artisan make:migration create_projects_table
In the migration file:
Schema::create('projects', function (Blueprint $table) {
$table->id();
$table->string('title');
$table->text('description');
$table->string('image')->nullable();
$table->timestamps();
});
Run the migration:
php artisan migrate
Building the Frontend
Step 1: Choose a CSS Framework
Laravel integrates well with frameworks like Tailwind CSS and Bootstrap. Install Tailwind CSS for modern and responsive designs:
npm install -D tailwindcss
npx tailwindcss init
Configure your Tailwind file and integrate it into your project.
Step 2: Create Blade Templates
Laravel’s Blade templating engine simplifies building dynamic pages. Create a layout file in resources/views/layouts/app.blade.php:
<!DOCTYPE html>
<html>
<head>
<title>@yield('title')</title>
<link rel="stylesheet" href="{{ asset('css/app.css') }}">
</head>
<body>
<div class="container">
@yield('content')
</div>
</body>
</html>
Use this layout in other views:
@extends('layouts.app')
@section('title', 'Home')
@section('content')
<h1>Welcome to My Portfolio</h1>
@endsection
Step 3: Dynamic Content
Fetch portfolio items from the database and display them dynamically using controllers.
public function index() {
$projects = Project::all();
return view('home', compact('projects'));
}
In your Blade template:
@foreach ($projects as $project)
<div class="project">
<h2>{{ $project->title }}</h2>
<p>{{ $project->description }}</p>
<img src="{{ $project->image }}" alt="{{ $project->title }}">
</div>
@endforeach
Advanced Features
1. Search Functionality
Add search to help visitors find specific projects or blogs.
public function search(Request $request) {
$query = $request->input('query');
$projects = Project::where('title', 'LIKE', "%{$query}%")->get();
return view('search-results', compact('projects'));
}
2. File Uploads
Enable uploading images for projects.
public function store(Request $request) {
$request->validate([
'title' => 'required',
'description' => 'required',
'image' => 'nullable|image',
]);
$imagePath = $request->file('image')->store('projects', 'public');
Project::create([
'title' => $request->title,
'description' => $request->description,
'image' => $imagePath,
]);
}
3. Integrate Analytics
Use Google Analytics or similar tools to track visitor behavior.
4. Deploying Your Website
Deploy your Laravel website using platforms like Laravel Forge, AWS, or Heroku. Ensure to optimize the performance with caching and minification.
Optimizing Your Portfolio Website for SEO
Keyword Integration: Use keywords like “Build Portfolio Website in Laravel 11” strategically in titles, meta descriptions, and content.
Fast Loading Times: Optimize images and use caching.
Responsive Design: Ensure compatibility with mobile devices.
Content Strategy: Regularly update your blog to attract organic traffic.
Conclusion
Building a portfolio website in Laravel 11 is an enriching experience that showcases your skills and work to the world. By leveraging the framework’s capabilities and integrating advanced features, you can create a website that stands out in the digital landscape. Start your journey today and make your mark with a professional portfolio website
0 notes
Text
What Is Web Development? A Beginner’s Guide to Building Websites
In the modern digital era, websites are essential for businesses, organizations and individuals to showcase their presence online. Behind every functional and visually appealing website lies a process called web development. But what exactly is web development, and how can beginners get started with building their own websites? This guide will break down the fundamentals of web development and provide a roadmap for anyone interested in creating their first site.
What Is Web Development?
Web development refers to the process of creating, building, and maintaining websites or web applications that run on the internet. It encompasses a variety of tasks, including designing website layouts, writing code, managing databases, and ensuring a seamless user experience. Web development is typically categorized into three main areas:
1. Front-End Development:
This involves designing the visual aspects of a website—the layout, color schemes, typography, and interactive features that users interact with directly. Front-end developers use languages like HTML, CSS, and JavaScript to bring these elements to life.
2. Back-End Development:
The back-end is the behind-the-scenes engine that powers a website. It includes server-side operations, databases, and application logic. Back-end developers work with languages such as Python, PHP, Ruby, or Node.js to manage the website’s functionality and data storage.
3. Full-Stack Development:
Full-stack developers are skilled in both front-end and back-end development. They have the expertise to handle every aspect of a website, making them versatile professionals in the web development field.
How to Start Building Websites as a Beginner
If you're new to web development, the process may seem daunting at first. However, breaking it down into smaller steps can make it more manageable:
1. Learn the Basics:
Start with foundational languages like HTML (for structure), CSS (for design), and JavaScript (for interactivity). There are numerous online resources and tutorials available to help you get started.
2. Choose a Development Environment:
Install a text editor or integrated development environment (IDE) like Visual Studio Code or Sublime Text. These tools make coding easier by providing syntax highlighting and other helpful features.
3. Build Simple Projects:
Begin with small projects, such as creating a personal portfolio site or a simple blog. Practice helps you gain confidence and improve your skills.
4. Explore Frameworks and Libraries:
Once you're comfortable with the basics, delve into frameworks like Bootstrap for front-end design or React for advanced functionality. These tools streamline the development process.
5. Publish Your Website:
Use platforms like GitHub Pages, Netlify, or traditional web hosting services to make your website live.
Conclusion
Web development is a dynamic and rewarding field that combines creativity and technical expertise. By learning the basics and gradually advancing your skills, you can create functional and visually appealing websites that meet modern standards. At akhilagnait.com, we aim to guide beginners and businesses through the journey of web development, offering insights, tools, and professional services to bring your ideas to life. Whether you’re just starting or looking for expert solutions, our team is here to help you build a robust online presence.
0 notes
Text
How to deploying Laravel projects on a live server – Complete Step-by-Step Guide
Learn How to deploying Laravel projects on a live server with this comprehensive guide. Step-by-step instructions on setting up hosting, configuring files, and deploying your Laravel app smoothly.Read Laravel Docs
How to deploying Laravel projects on a live server, you’ll need to follow a structured process. Here’s a step-by-step guide to help you:

1. Purchase Domain and Hosting
Make sure you have a domain and a hosting plan. Most shared hosting plans (like cPanel-based ones) or a VPS will work for Laravel, but ensure your server supports PHP and MySQL and meets Laravel’s requirements (PHP version, required extensions, etc.).
2. Prepare Your Laravel Project
Make sure your Laravel project is working locally.
Run the following command to clear any cached configuration and to optimize the project:
php artisan cache:clear
php artisan config:clear
php artisan route:clear
php artisan view:clear
Set up your environment variables (.env file). Make sure they are correctly configured for the live server (e.g., database, mail, and app URL settings).
3. Zip and Upload Your Laravel Project
Compress your entire Laravel project folder (without the node_modules and vendor directories) into a .zip file.
Use FTP (with FileZilla or any other FTP client) or File Manager in cPanel to upload the .zip file to your server. Typically, upload the file to the public_html or a subdirectory within it if you want to run your Laravel app in a subdirectory.
4. Extract the Files
Once uploaded, use File Manager in your hosting control panel to extract the .zip file.
5. Set Up the Public Directory
By default, Laravel’s entry point is the public folder, which contains the index.php file. On a shared hosting server:
Move everything in the public folder (including the .htaccess and index.php files) to the root directory (usually public_html).
Edit the index.php file to update the paths:
Change:
require __DIR__.'/../vendor/autoload.php';
$app = require_once __DIR__.'/../bootstrap/app.php';
To:
require __DIR__.'/vendor/autoload.php';
$app = require_once __DIR__.'/bootstrap/app.php';
This ensures that Laravel can find the necessary files in the correct directory.
6. Set File Permissions
Ensure that the following directories are writable by the server:
/storage
/bootstrap/cache
Use the following command via SSH (if available) or through the hosting file manager:chmod -R 775 storage chmod -R 775 bootstrap/cache
7. Set Up a Database
Create a MySQL database and a user with privileges in cPanel (or via SSH if using VPS).
Update the .env file with your database credentials:
DB_HOST=localhost DB_DATABASE=your_database_name DB_USERNAME=your_database_username DB_PASSWORD=your_database_password
8. Install Composer Dependencies
If you have SSH access:
SSH into your server using a terminal or a tool like PuTTY.
Navigate to your project directory
cd /path/to/your/project
Run Composer to install the dependencies:
composer install --optimize-autoloader --no-dev
If you don’t have SSH access, you can run composer install locally, zip the vendor folder, and upload it to the server.
9. Run Migrations
If you have SSH access, run the following command to migrate the database:
php artisan migrate --force
If you don’t have SSH access, you can run the migrations locally and then export/import the database to the server via phpMyAdmin.
10. Set App Key
Generate a new application key if you haven’t already:php artisan key:generate
Ensure the key is set in the .env file:
Read Full Tutorials
0 notes
Text
Web Development Journey: Create, Innovate, and Inspire!
Embarking on a web development journey can be both exhilarating and challenging. Whether you’re a beginner or a seasoned developer, there are key steps to help you create, innovate, and inspire others in the digital space.

1. Learning the Basics
Start with the fundamentals: HTML, CSS, and JavaScript. These languages are the backbone of web development. Online platforms like Codecademy, freeCodeCamp, and MDN Web Docs offer excellent resources to get you started.
2. Building Projects
Apply what you learn by building real projects. Start with simple websites and gradually tackle more complex applications. This hands-on experience is invaluable and enhances your problem-solving skills.
3. Version Control
Learn Git and GitHub for version control. This is essential for collaborating with others and managing your code effectively. It allows you to track changes, revert to previous versions, and work seamlessly in teams.
4. Exploring Frameworks
Once you’re comfortable with the basics, explore frameworks like React, Angular, or Vue.js. These tools streamline the development process and enable you to create dynamic web applications.
5. Responsive Design
Focus on creating responsive designs. Use CSS frameworks like Bootstrap or Tailwind CSS to ensure your websites look great on all devices. A mobile-friendly site is crucial in today’s mobile-first world.
6. Backend Development
Expand your skills by diving into backend development. Learn about server-side languages (like Node.js, Python, or PHP) and databases (such as MongoDB or MySQL) to create full-stack applications.
7. Stay Updated
Web development is ever-evolving. Follow industry trends by reading blogs, attending webinars, and joining communities on platforms like Reddit and Stack Overflow. Staying current will keep your skills relevant.
8. Inspiring Others
Share your knowledge! Write blogs, create tutorials, or mentor newcomers in the field. Inspiring others not only reinforces your own learning but also contributes to the web development community.
9. Building a Portfolio
As you progress, build a portfolio showcasing your projects. This is crucial for attracting potential employers or freelance clients. Include descriptions, technologies used, and links to live demos.
10. Networking
Engage with other developers through forums, local meetups, or conferences. Networking can open doors to new opportunities and collaborations, and you’ll gain insights from experienced professionals.
Conclusion
Your web development journey is a continuous cycle of creation, innovation, and inspiration. Embrace challenges, stay curious, and never stop learning. The web is a vast landscape where your skills can make a significant impact.
#WebDevelopment #CodingJourney #LearnToCode #FullStackDevelopment #WebDesign #ResponsiveDesign #Git #Programming #TechCommunity #InspireOthers
0 notes